Visual supports are a part of our everyday life. Take these examples:
Bathroom:
Don’t forget to wash your hands.
Shampoo:
Wash, rinse, repeat.
Street Signs:
Do not enter.
One way.
Stop.
Public Places:
Enter.
Exit Only.
Start line here.
I’m sure I could go on and on (especially if I keep looking around me at Starbucks). The point, though, is that we all need visual supports to function in an orderly way. It’s also very common to use visual supports when teaching new skills to individuals with special needs. What’s great about visuals is that they are fairly easy to fade to promote independence.
Special education teachers are no stranger to picture icons, a laminator, and velcro. A lot of the paid and unpaid printables you see online are actually created by teachers and therapists. I actually recommend searching for visuals online because it does save a lot of time if it’s already done. However, there are also times when you can’t find something you need. In this post, I’ll show you a simple way to create some visuals using your phone and Microsoft Word. So let’s start with the basics:
What are visuals?
Visuals are picture representations of anything related to the task you want to teach. Pictures only provide a prompt or a reminder, so you will be the person to demonstrate the meaning behind the picture. For example, a picture of a spoon could mean:
It’s time for a snack.
Go get a spoon.
Unload the dishwasher.
Set the table.
As you can see, there’s a lot of different meanings you can give to one picture, so it’s important to communicate the meaning effectively.
What kind of skills can you teach?
The possibilities are endless when it comes to the skills you can teach. Sometimes it takes bit of creativity, but luckily there are plenty of resources out there to give you inspiration (more on this below). Here’s a short list of visuals used to teach new skills:
- Language - building your child’s communication skills
- This is an apple. It is red. Apple is a food. You eat apples. They grow from trees. Let’s make apple pie :)
- Set rules and expectations - often addresses behaviors
- Hallway - quiet hands, quiet mouth, stay in line
- Safety - hold mommy’s hands when walking outside, stay close
- Sequencing - step-by-step instructions
- Folding laundry - lay out pants, fold in half, fold in half again
- Restocking napkins - get box of napkins, turn holder on it’s back, open holder, place napkins until full, close container, put holder back on bar (can you tell I’m still at Starbucks?)
- Social stories - these simple stories sometimes go hand in hand with setting rules and expectations
- Story on why staying with parents when walking outside is safe
- Story about going to the dentist and what you will see
- Story on sharing and getting your feelings hurt
There are plenty of resources out there through Teachers Pay Teachers (TpT), Boardmaker, Pinterest, and parent/educational blogs. To be honest, if it’s already created, I don’t mind paying the $5 or so for the bundles based on topic. It definitely saves time and sometimes using software like Boardmaker or Microsoft Word can be a hassle (especially if you’re like me and expect the sizes to be perfect). It’s really about the actual teaching, though, not the sizes of the pictures.
Personally, I subscribe to Boardmaker Online because they have a large library of pictures and it’s an easy way for me to find icons specific to the list I described above. The platform is a bit rigid and old fashioned, but it does the deed!
Microsoft Word is helpful when you are taking and using your own pictures. This came up recently in one of my sessions because we’ve been using a bundle from TpT to teach chores at home. Although we were able to fold laundry and sort silverware, the washing dishes sequence was a little different to how the family did things at home. It makes sense because we all do dishes differently. For example, my family never used the dishwasher. In fact, I didn’t know how to use one until college and I realized it was ah-mazing! Even when washing by hand, my family and my husband’s family do it differently.
In my session, I asked the family how they wash dishes and found it was different from the template they got through the bundle. Then I asked another question: How often do you wash by hand? They said rarely! They just load the dishwasher. So, our next task to teach was to load the dishwasher. Problem solved! I asked the mother to demonstrate how she loads the dishwasher and wrote down every step.
I’m going to brag about the mother a bit because she’s been creating the visuals as we go with each task and even velcros them to the paint sticks. She says creating the visuals actually helps her break down the skills needed to teach the task. When you do these things every day, you’re kind of on autopilot and forget all the tiny steps to get things on your list done. That’s why it helps to make a list of these steps.
Here’s how to upload and resize the photos in Microsoft Word:
- Take photos you need on your phone.
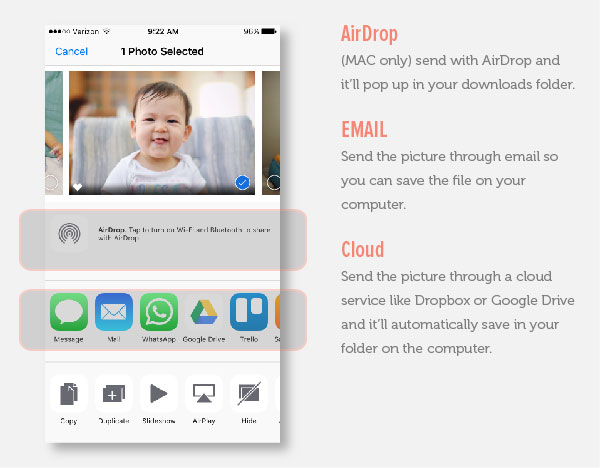
- Upload photos to your computer. With the iPhone you can use the AirDrop if you’re using a Mac, which will save to your downloads folder. For other options, send yourself an email, use a cloud (iCloud, Dropbox, Google Drive), or plug you phone into your computer.
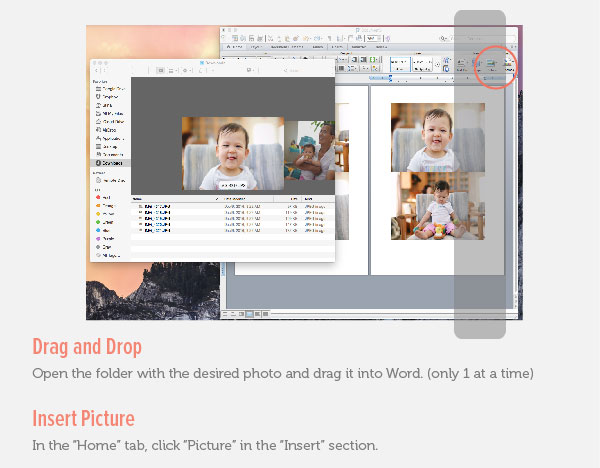
- Place your photos into Microsoft Word.
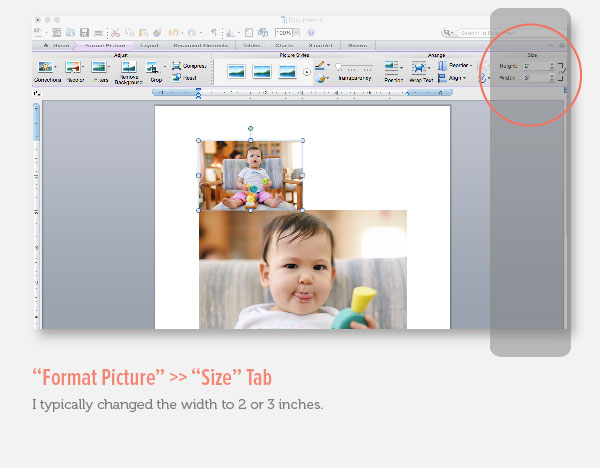
- Click on the photo and a tab called “Format Picture” will show up.
- In the tab, you should see a section called “Size.”
- To keep the dimensions of the picture without distorting it, keep the box on the right checked.
- I typically will just change the width to either 2” or 3”.
- Voila! Do the same to the other pictures and they’ll all be the same size.
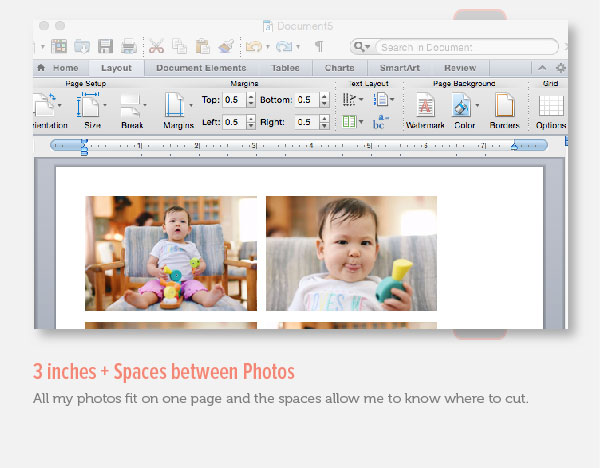
- When I print, I like to add a little space between the photos, so I click outside of the picture to get the flashing text line and use the arrow keys to get in between the photos. Use the spacebar to your heart’s desire. This allows you to know where to cut the photos before laminating.
- Cut, laminate and velcro!
I thought these paint sticks are a brilliant idea, whoever came up with them! Can you tell I like Kashi (Vanilla) cereal? I even created a how-to make your own cereal sequence (aka task analysis).
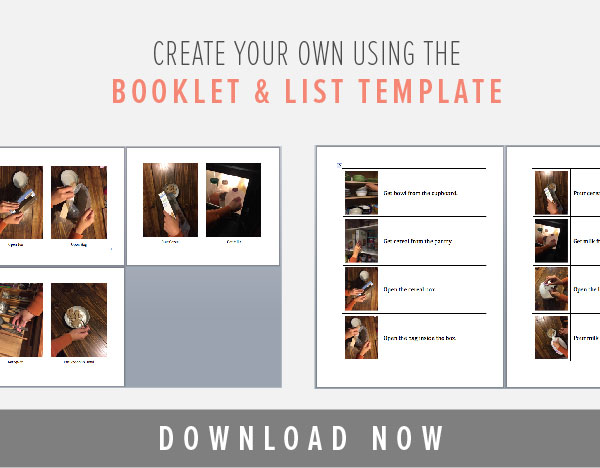
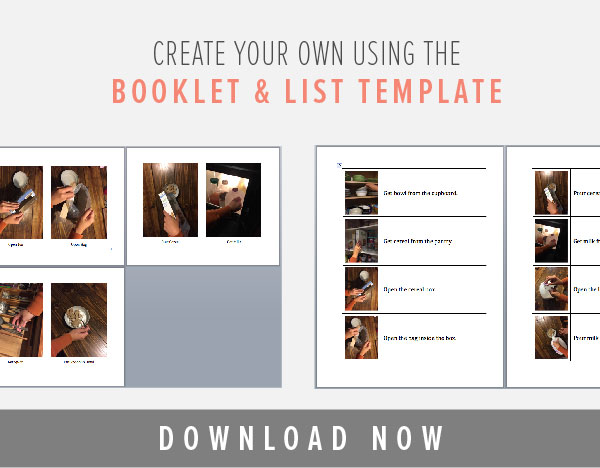
To create booklets or social stories, I like to create tables because you have more control over the pictures and text. Again, I like my alignment to be uniform.
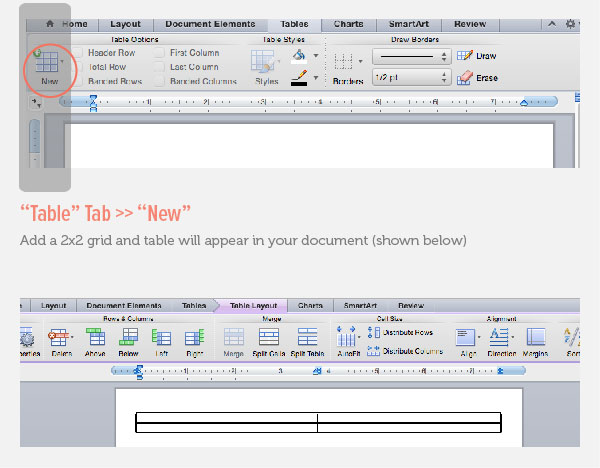
- To create a table, click the tab “Tables.”
- On the far left, click the dropdown where you see “New” with an icon of a grid.
- I usually use a 2x2 grid (you can always add more or less).
To create a book with 2 images per page:
- Add the 2x2 grid.
- Insert images by drag-and-drop, or use the “Insert” function on your “Home” tab.
- Resize the photos (I used 3”).
- Choose your font size (I used 20 pt below my images).
- To center the photos and text, highlight the entire grid using the icon in the top left corner when you hover. Go to the “Table Layout” tab and click “Align” under the alignment section. Then click “Center.”
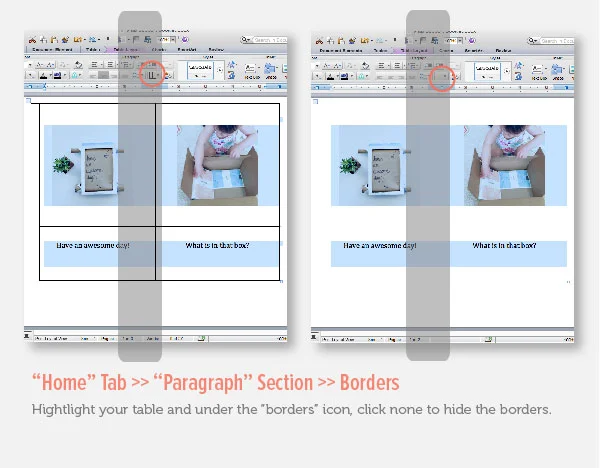
- It’s up to you whether you want to use the lines in the table, or if you want the lines hidden. If you want them hidden, highlight the entire table, go to the “Home” tab and click “None” under borders in the “Paragraph” section.
To create a list format with the picture on the left and text on the right:
- Add the 2x2 grid.
- Insert images in the left column by drag-and-drop or use the “Insert” function on your “Home” tab.
- Resize photos (this time I used 2”).
- Choose your font size (I used 20 pt).
- Align the photos and text using the “Table Layout” tab and click “Align” under the alignment section. In the photo column (left), I centered the photos. In the text column (right), I clicked “Center Right.”
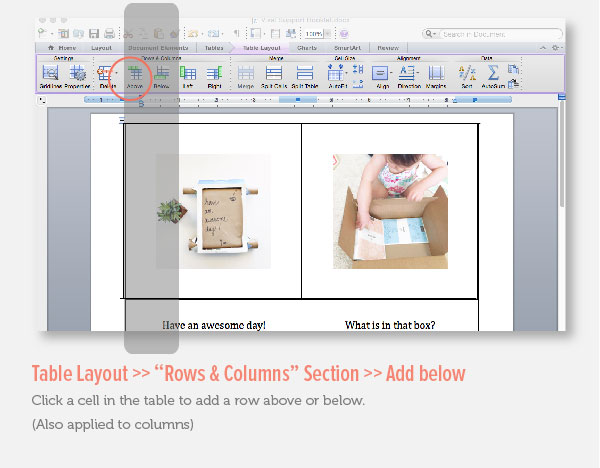
- To add more rows, click any box in the last row and go to the “Table Layout” tab. Under the “Rows & Columns” section, add a row “Below.”
- Continue until you finish your whole story.
- Again, it’s up to you whether you want to use the lines in the table, or if you want the lines hidden. If you want them hidden, highlight the entire table, go to the “Home” tab and click “None” under borders in the “Paragraph” section. It’s all about your design preference.
Will you give it a try? I’ve included a simple Microsoft template of the tables mentioned above for both a book or list. Just replace the images and text! Check it out in my Resource Library.
Here are a couple of people I follow on Teachers Pay Teachers:
Follow me on Pinterest and check out my “Visuals” board:
I have an annual account with Boardmaker Online, but as I mentioned I typically will use it for the library of icons.

