

If you’ve gotten to know me on Instagram, you know woodworking is one of my favorite hobbies. About a month ago I posted this calendar project I created for my daughter, and I got a few requests to put together a tutorial.
All the recent back-to-school posts keep reminding me I got one more year with my daughter 😭😭😭 before she goes to public school. Since she’s not in any preschool type programs, I plan on adding a little more structure to our Friday home routine, like exploring STEAM activities, reading, and this calendar I’m about to show you.
I’ve been reading up on Tot School and found this cool article about using calendars with toddlers. First, she recommends using a real calendar because it’s similar to how adults cross off their calendars/to-do lists.
And while all the calendar stuff I remember growing up with (circle time songs) does not connect with toddlers, there are still ways to make calendar time meaningful:
Crossing off yesterday
Teaching today
Drawing simple pictures

I LOVE the idea of drawing things that grow over time like a plant or a bug. We can also draw upcoming trips or the weather. The Dad Lab, of course, has an awesome video demonstrating a simple to grow beans in a jar.
Honestly, calendar time takes a minute and then we’re off doing other things, but it’s still a chance to have fun while learning.
This is my first attempt writing a woodworking tutorial - so bear with me :)
Wooden Calendar Tutorial
Materials: (*amazon affiliate links below)
4 - 1”x2”s at 22” each; Home Depot/Lowe’s can easily cut these for you
Drill with 5/16” bit
Twine
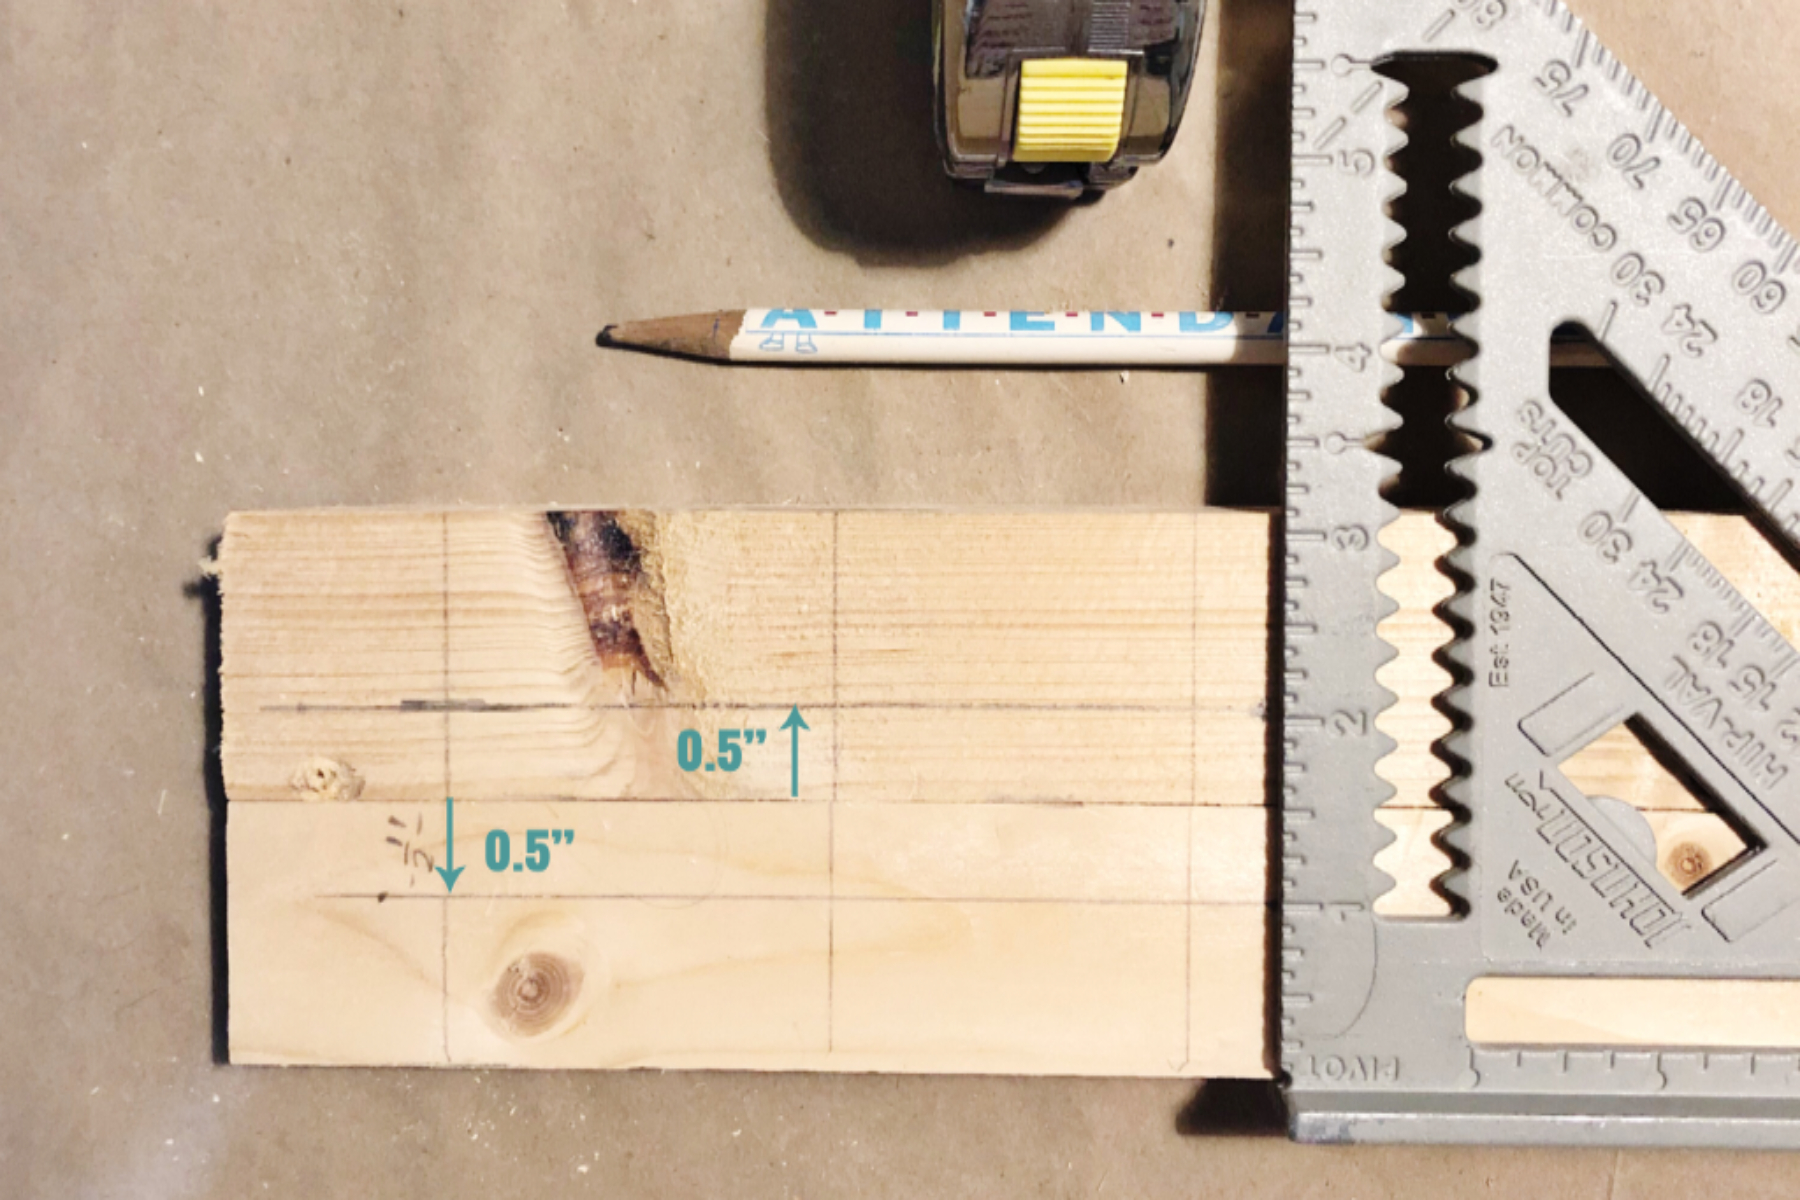
Step 1: Pair up your 1x2s and draw lines to mark holes. I drew random vertical lines and drew a horizontal line 0.5” from the edge. I ended up with 5 vertical lines, but I would maybe add 2-3 more for the boards to have a stronger hold.
Step 2: Drill holes where the lines cross; place your magnet to make sure it’s flush with the board. I used a 5/16” drill bit - figured it out by placing a magnet at the edge!


Step 3: Glue the magnets in place. Make sure the magnets are turned correctly so that they don’t repel the connecting piece on the opposite board. Let the glue dry for 24 hours.
Don’t be impatient like me. If the instructions say 24-72 hours, then follow it. 😂 I ended up re-gluing the magnets.
Step 4: Staple the cardboard backing from your desk calendar to the 1x2s.
Step 5: Add string by either stapling or cutting a slit in the 1x2.

Step 6: Add this month’s page on top of the cardboard and snap the magnetic boards in place. It should hold the paper without any additional support.
Ta da! Your calendar is ready to hang!
